Spot hidden signals from above in Arc Raiders’ Eyes in the Sky quest-your LiDAR Scanner holds the key to piercing the veil.
It can prove tricky if you don’t know exactly where you’re headed, especially if luck isn’t on your side and you fall foul of fellow players or Arc enemies. As there is no need to ferry back a specific piece of loot, a Free Loadout is the way to go here so that if you do encounter any trouble, you’re not wasting your best gear. In this guide, we’ll walk you through how to complete the Arc Raiders Eyes in the Sky quest.
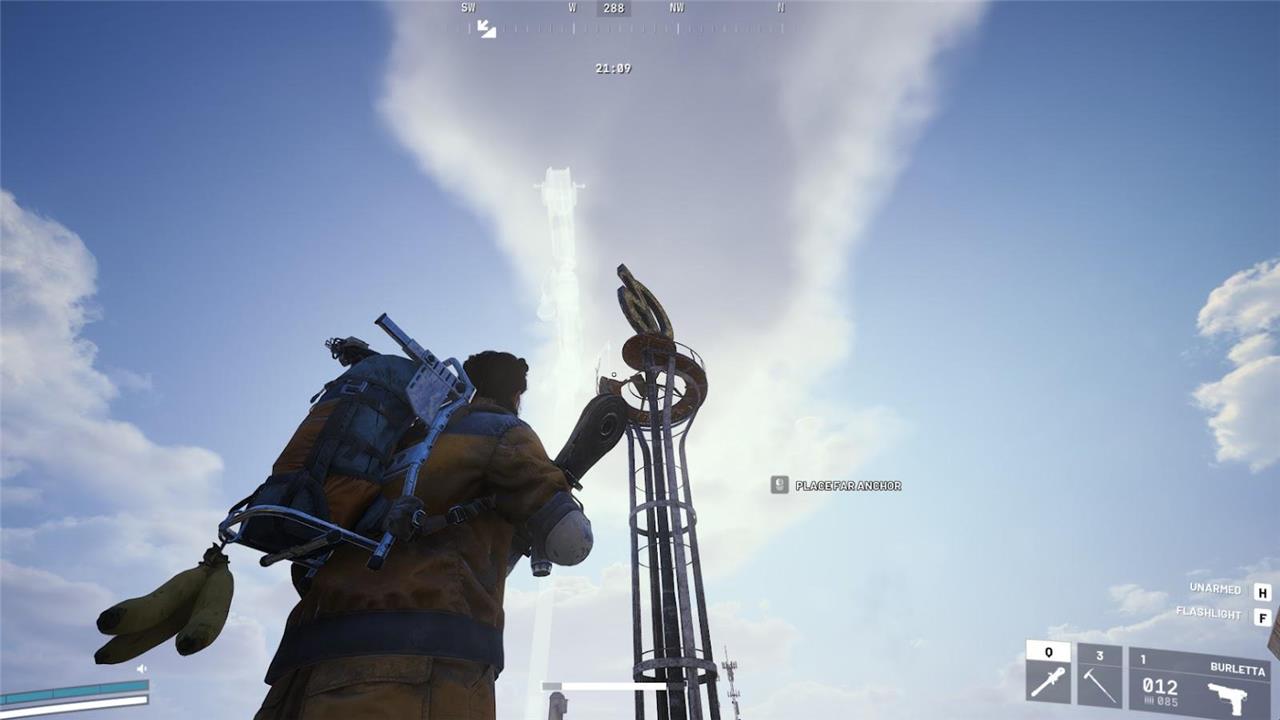
On Dam Battlegrounds, install a LiDAR Scanner at the top of the Control Tower
Climb the Control Tower in Dam Battlegrounds to reach its summit. Place the LiDAR Scanner there by interacting with the designated spot. This action completes the Eyes in the Sky objective and activates aerial scanning across the map. Watch for enemy patrols during the ascent, and use cover from nearby structures to stay hidden.
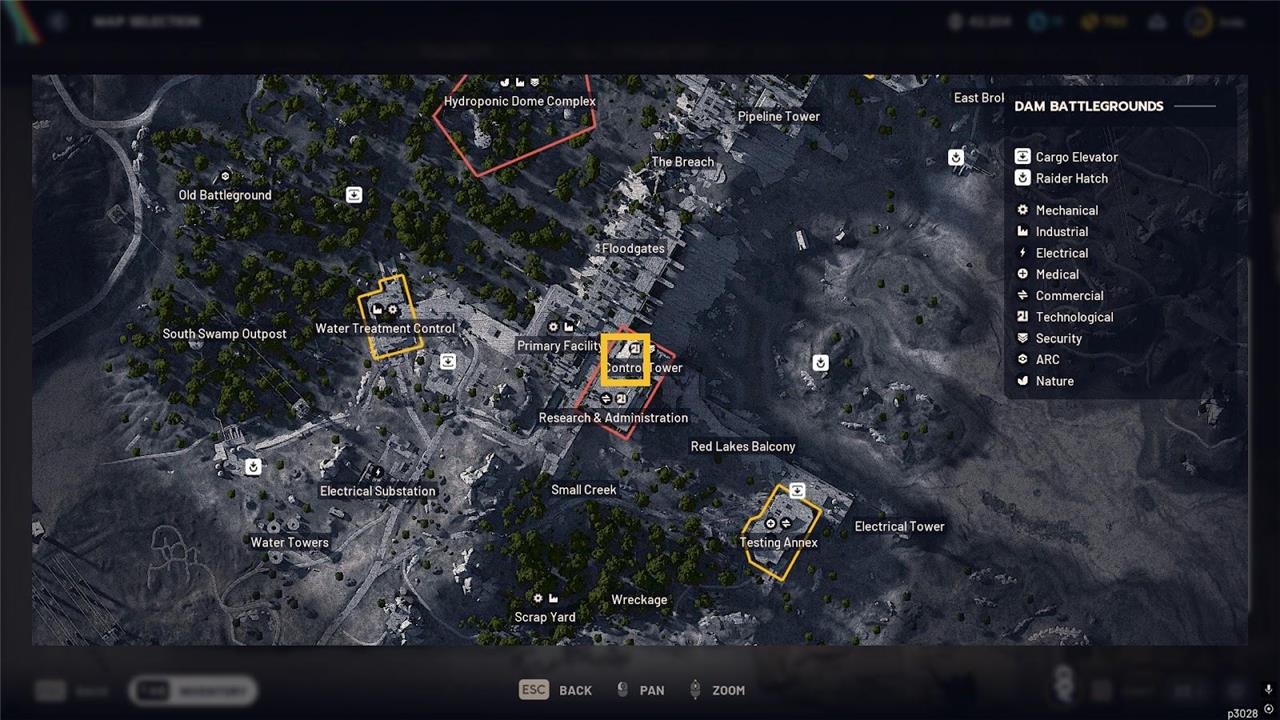
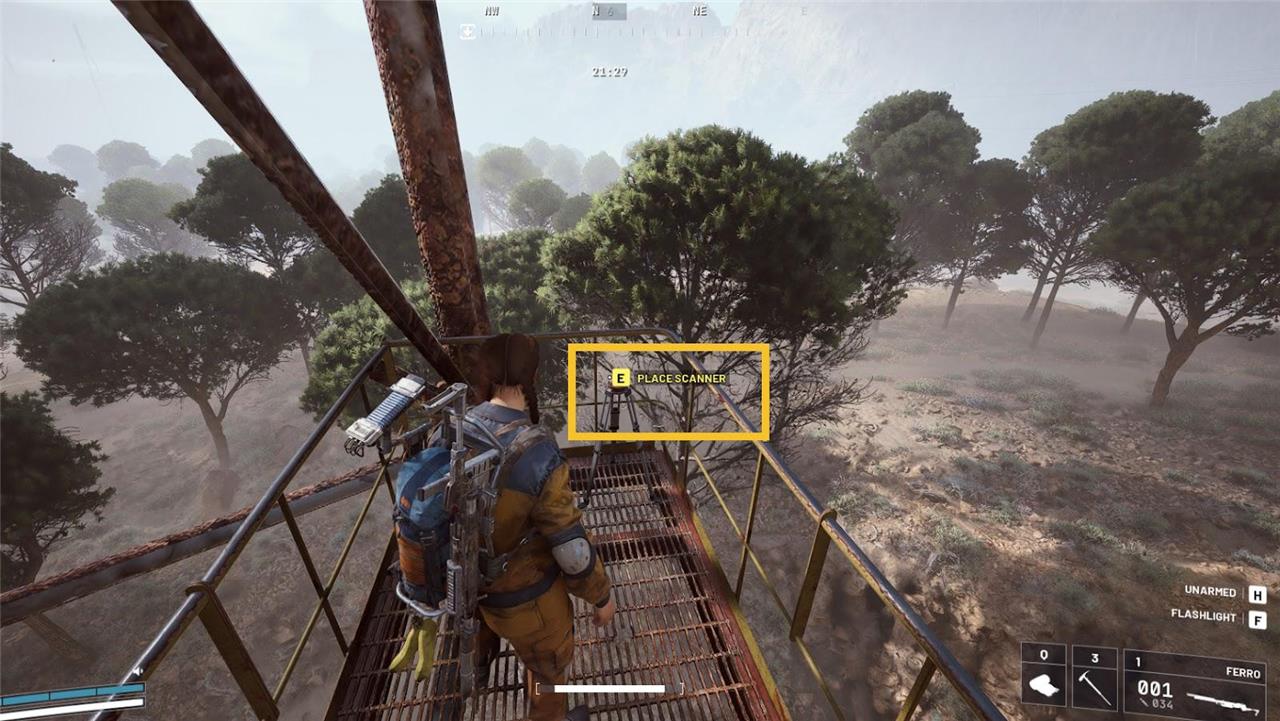
You’ll find the first LiDAR Scanner tripod on the roof of the Control Tower, which is more or less in the center of Dam Battlegrounds. It’s attached to Research and Administration, northwest of the Red Lakes Balcony and east of the Primary Facility.
Though you can enter through the main entrance to the east, there’s a way through from the Red Lakes Balcony that sees less foot traffic, so it’s potentially less dicey. Approach from the Red Lakes Balcony and you’ll spot a tunnel. Head inside and take the zip line up to reach a platform.

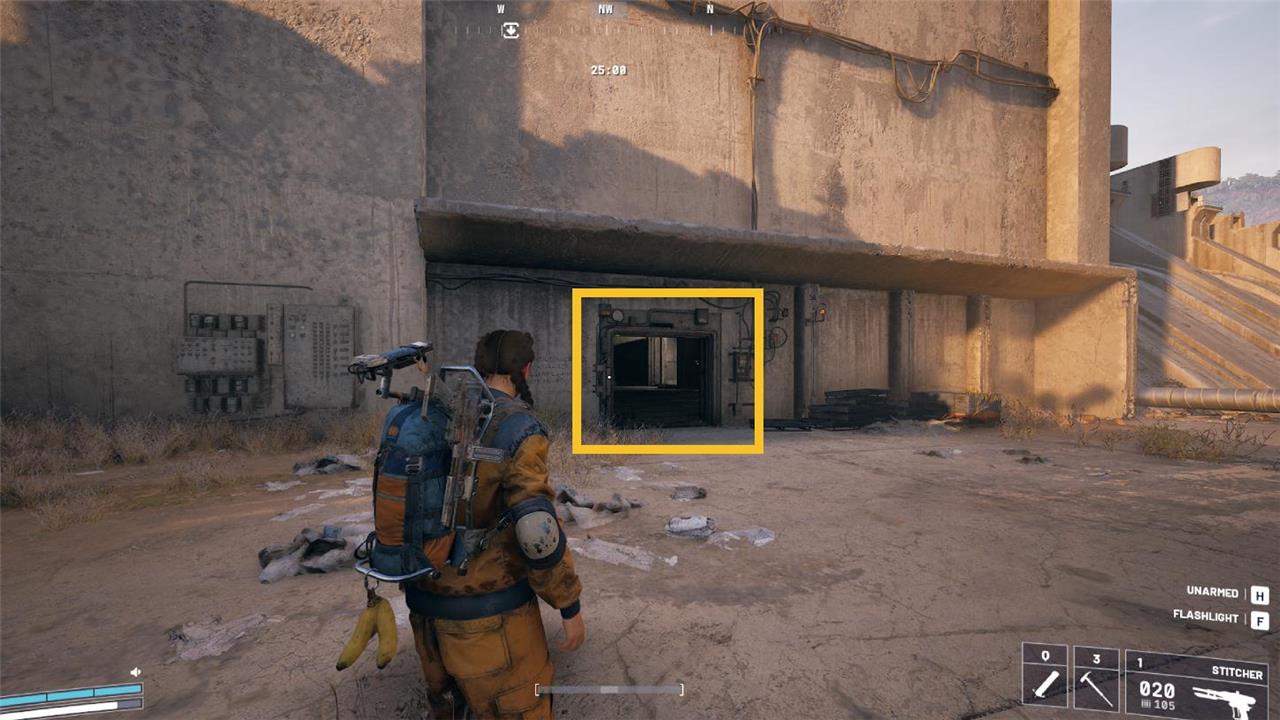
Look up and shoot the turrets in the shaft above. Zipline to the top and breach through the door. Press forward until you reach a door, breach it, and then access the roof. You’ll find the tripod to the east, sitting near the edge of the roof. Place the scanner.
On Spaceport, install a LiDAR Scanner at the Communications Tower
Head to the Spaceport and make your way to the Communications Tower. Once there, locate the installation point marked for the LiDAR Scanner. Interact with the terminal or prompt that appears to begin the installation process. Stay alert-enemies may patrol nearby, so secure the area before initiating the task. After the scanner is in place and activated, a short sequence will confirm that the system is now operational, progressing the Eyes in the Sky objective.
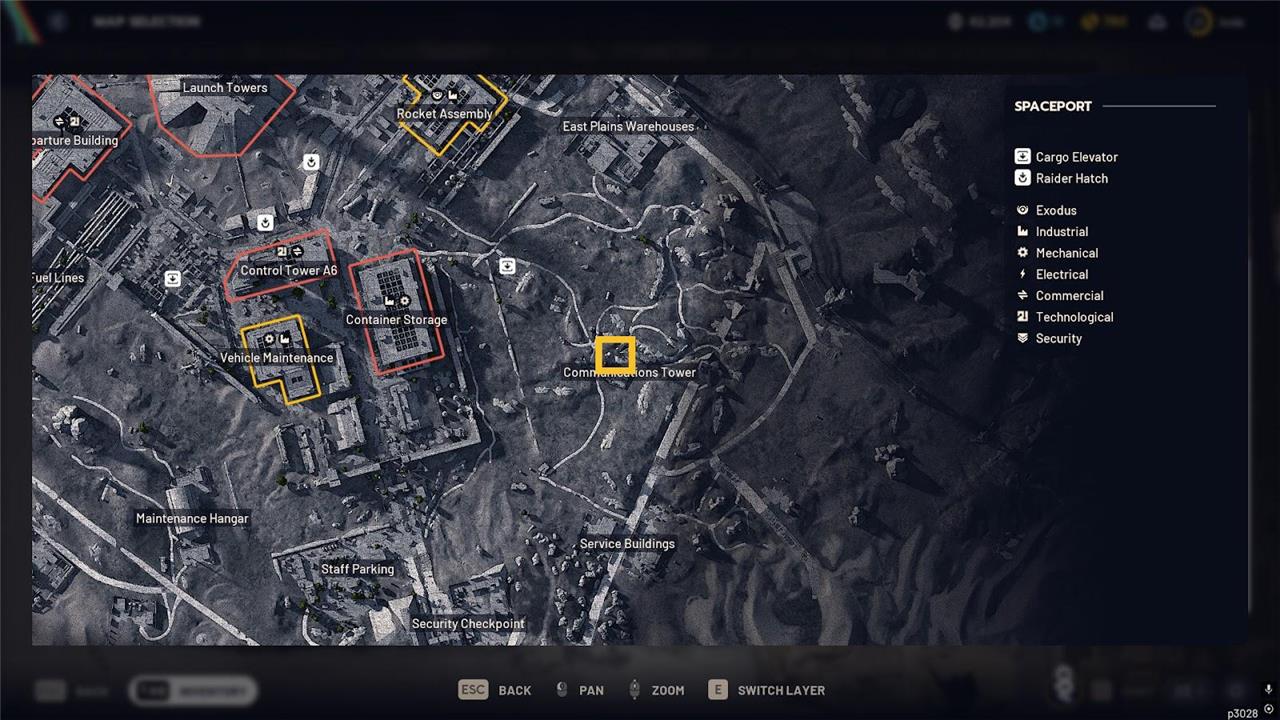
The second tripod on Spaceport is a lot easier to deploy. Head to the Communications Tower in the East Plains region in the east of the map. It’s not far from Container Storage, with the East Plains Warehouses to the north and the Service Buildings to the south.
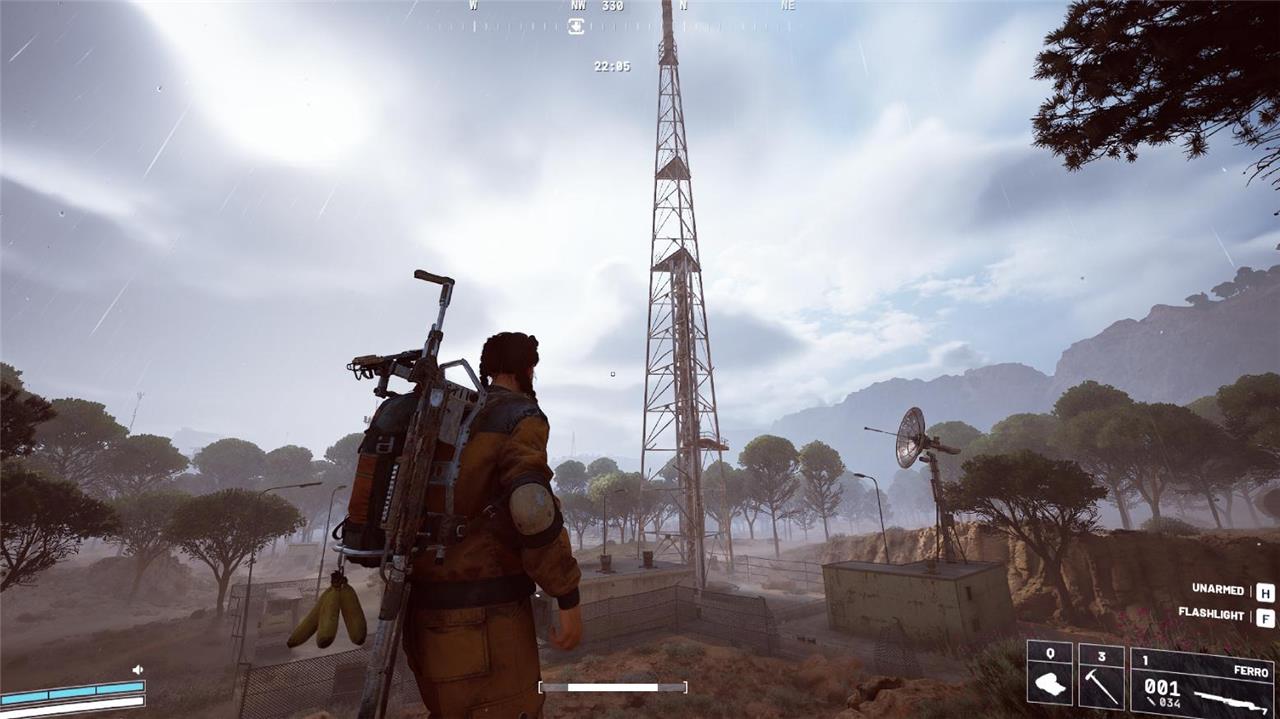
Once there, make your way to the massive antenna and climb the ladder up. At the top, follow the path to find the tripod. Place the scanner to complete the second Arc Raiders Eyes in the Sky quest objective.
On Buried City, install a LiDAR Scanner on top of the Galleria sign
Head to the Buried City and locate the large Galleria sign near the central plaza. Climb to the top of the structure using the nearby scaffolding or jetpack boost points. Once at the highest platform, interact with the marked installation point to mount the LiDAR Scanner. Once the device is secured, a signal pulse will sweep across the area, updating your map with new terrain and hidden object data needed for the next part of the quest.
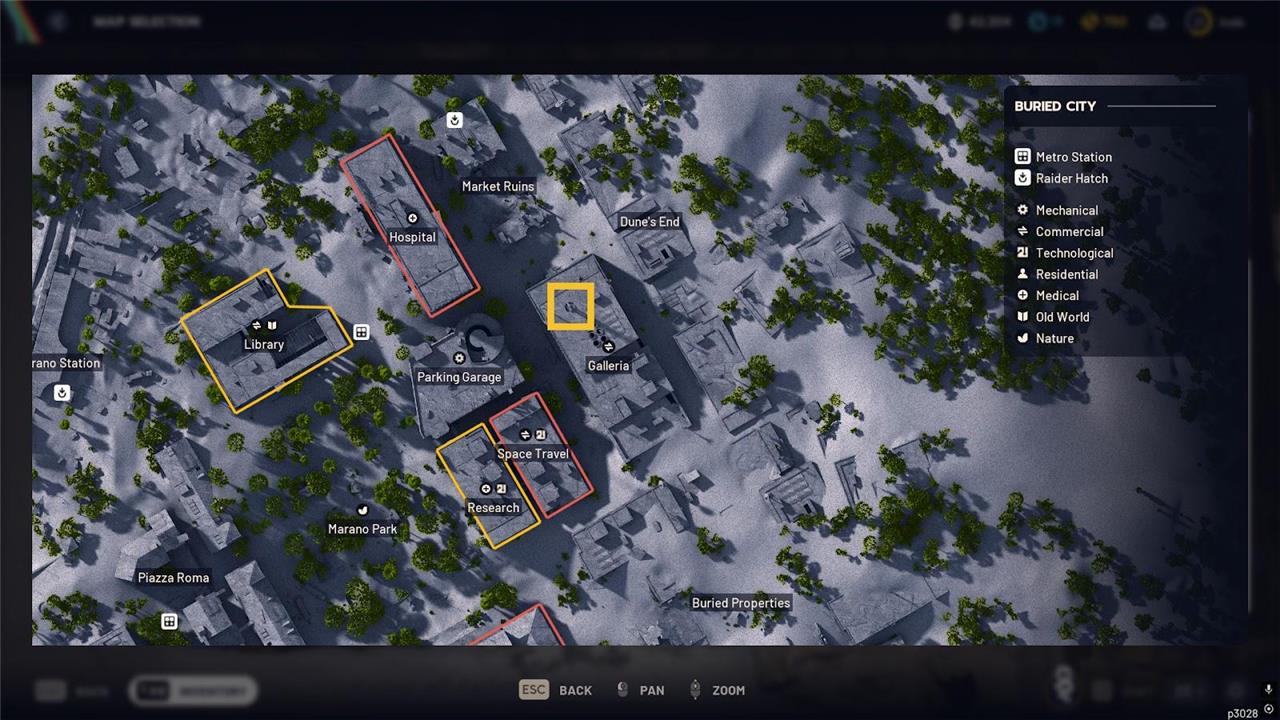
Last but not least is the Buried City LiDAR scanner tripod. You’ll need a Zipline for this one. Shani will have given you one when you accepted the quest. A custom loadout is a good option here, allowing you to stow the Zipline in your Safe Pocket and avoid losing it if you’re gunned down before reaching the tripod.
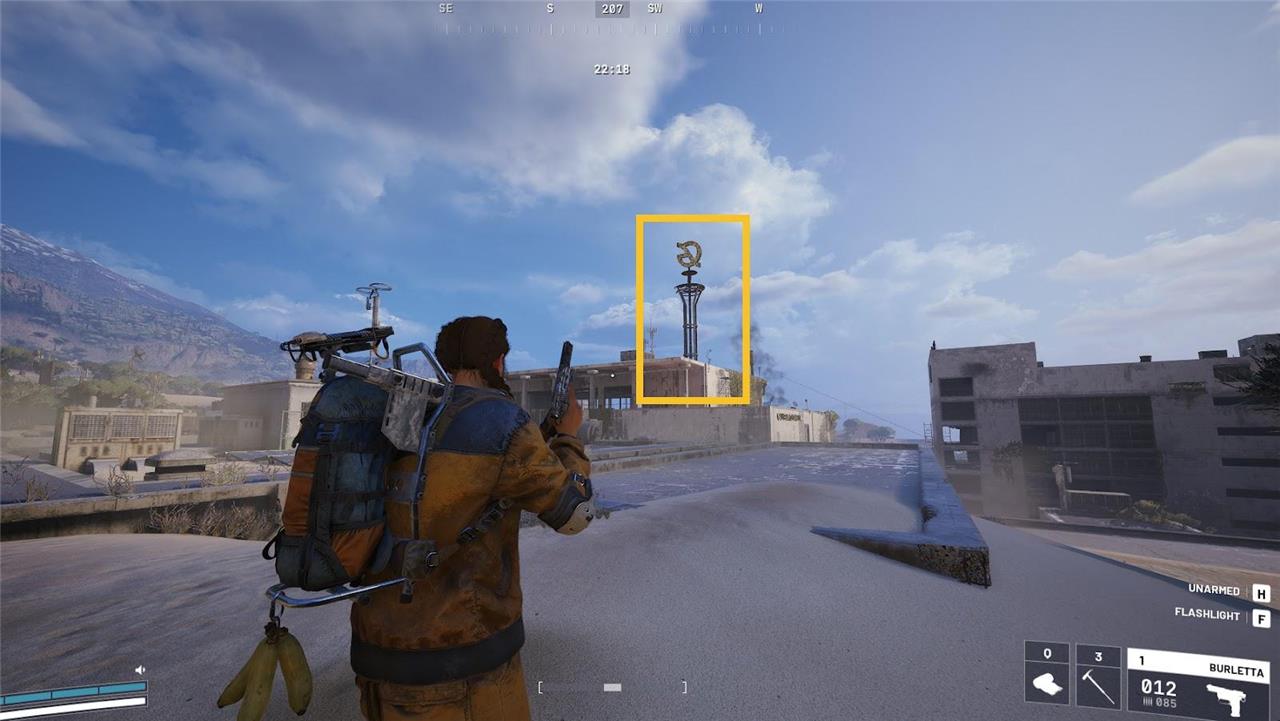
Load into Buried City and make your way over to the Galleria building in the New District portion of the map near Space Travel, Parking Garage, Hospital, and Dune’s End. It’s not too far from the Farmacia you’ll visit for the Arc Raiders A Reveal In Ruins quest. As you approach the building, you’ll see a tall metallic structure jutting upwards with a stylized letter ‘G’ at its peak. This is what you’re aiming for.
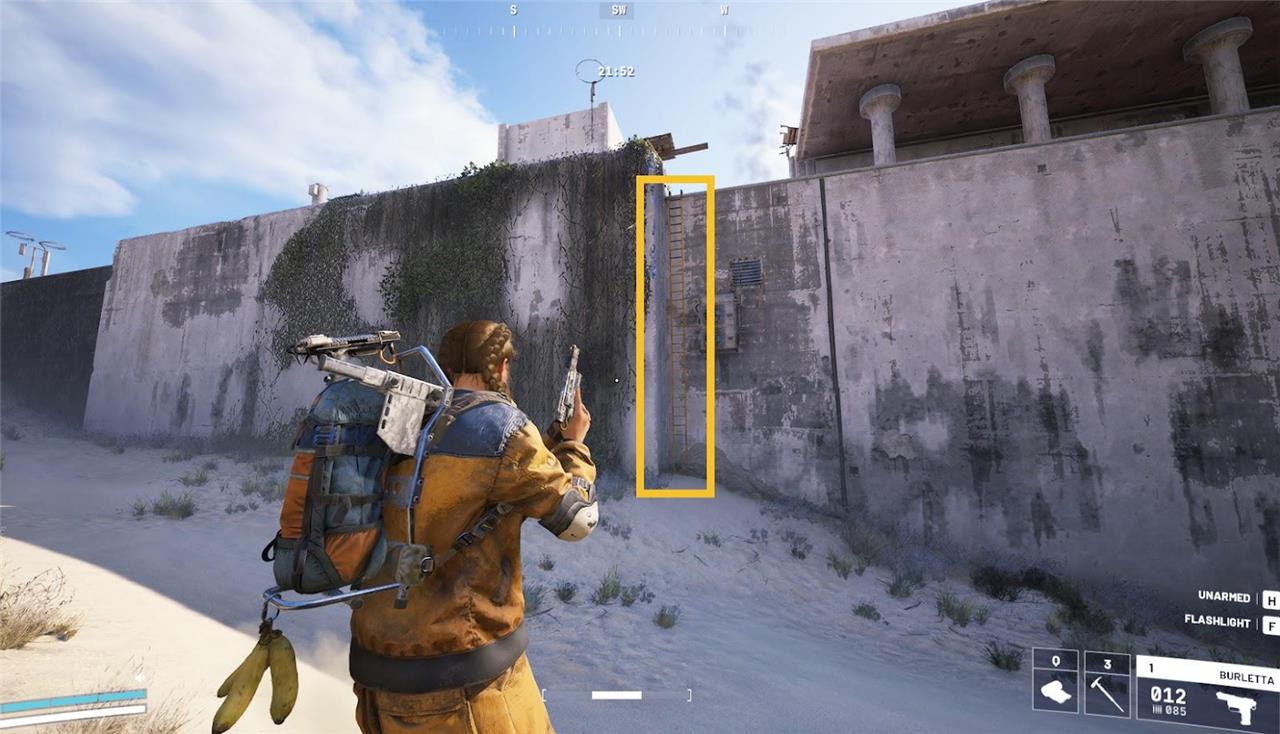

Head to the eastern side of the building, and you’ll spot a ladder you can use to reach the roof. As soon as you get on the roof, head forward, take a left, and you’ll see scaffolding you can climb up, then scramble up to the top of the adjacent block. Use the wooden planks to run and jump across the gap. Pull out your Zipline and aim it at the walkway near the top of the ‘G’ structure. Zipline up, and you’ll find the tripod on the walkway.
Show exact coordinates for each LiDAR install spot
Arc Raiders does not publicly document exact numerical coordinates (such as X/Y grid values) for the LiDAR Scanner installation spots in its “Eyes in the Sky” quest, as the game relies on visual landmarks, map markers, and interactive guides rather than precise GPS-style positioning.
Location Descriptions
Guides consistently describe spots by in-game map regions and structures instead of coordinates:
-
Dam Battlegrounds: Control Tower rooftop, south-central map area-climb ropes/stairs after clearing turrets.
-
Spaceport: Communications Tower summit, eastern section-ascend ladder and walkway.
-
Buried City: Galleria Sign rooftop (east-central, near Q-symbol pillar)-zipline access via planks.
Interactive Maps
Use community tools for visual pinpointing:
-
Metaforge.app or similar overlays show exact markers without numerical coords.
-
YouTube walkthroughs (e.g., timestamps at 1:20, 3:45) highlight spots precisely.
Check in-game maps post-update or official patch notes for any coordinate reveals, as none appear in current guides.
Provide coordinates in decimal degrees and UTM for each LiDAR site
Arc Raiders does not use real-world decimal degrees or UTM coordinates for its in-game LiDAR Scanner sites, as these are fictional locations within the game’s virtual maps rather than Earth-based geography.
Coordinate Availability
No official or community sources provide numerical coordinates in decimal degrees (lat/long) or UTM format for the “Eyes in the Sky” quest spots. The game employs internal grid markers, visual icons on the minimap, and landmark descriptions instead.
Navigation Alternatives
Rely on these precise in-game references:
-
Dam Battlegrounds: Control Tower at approximate map grid south-center (look for tower icon post-drop).
-
Spaceport: Communications Tower eastern edge (ladder base marked on approach).
-
Buried City: Galleria Sign east-center rooftop (Q-pillar zipline entry).
Interactive maps on sites like metaforge.app overlay exact icons without numerical coords.